The Death Of Marat (WIP)

Hello Internets.
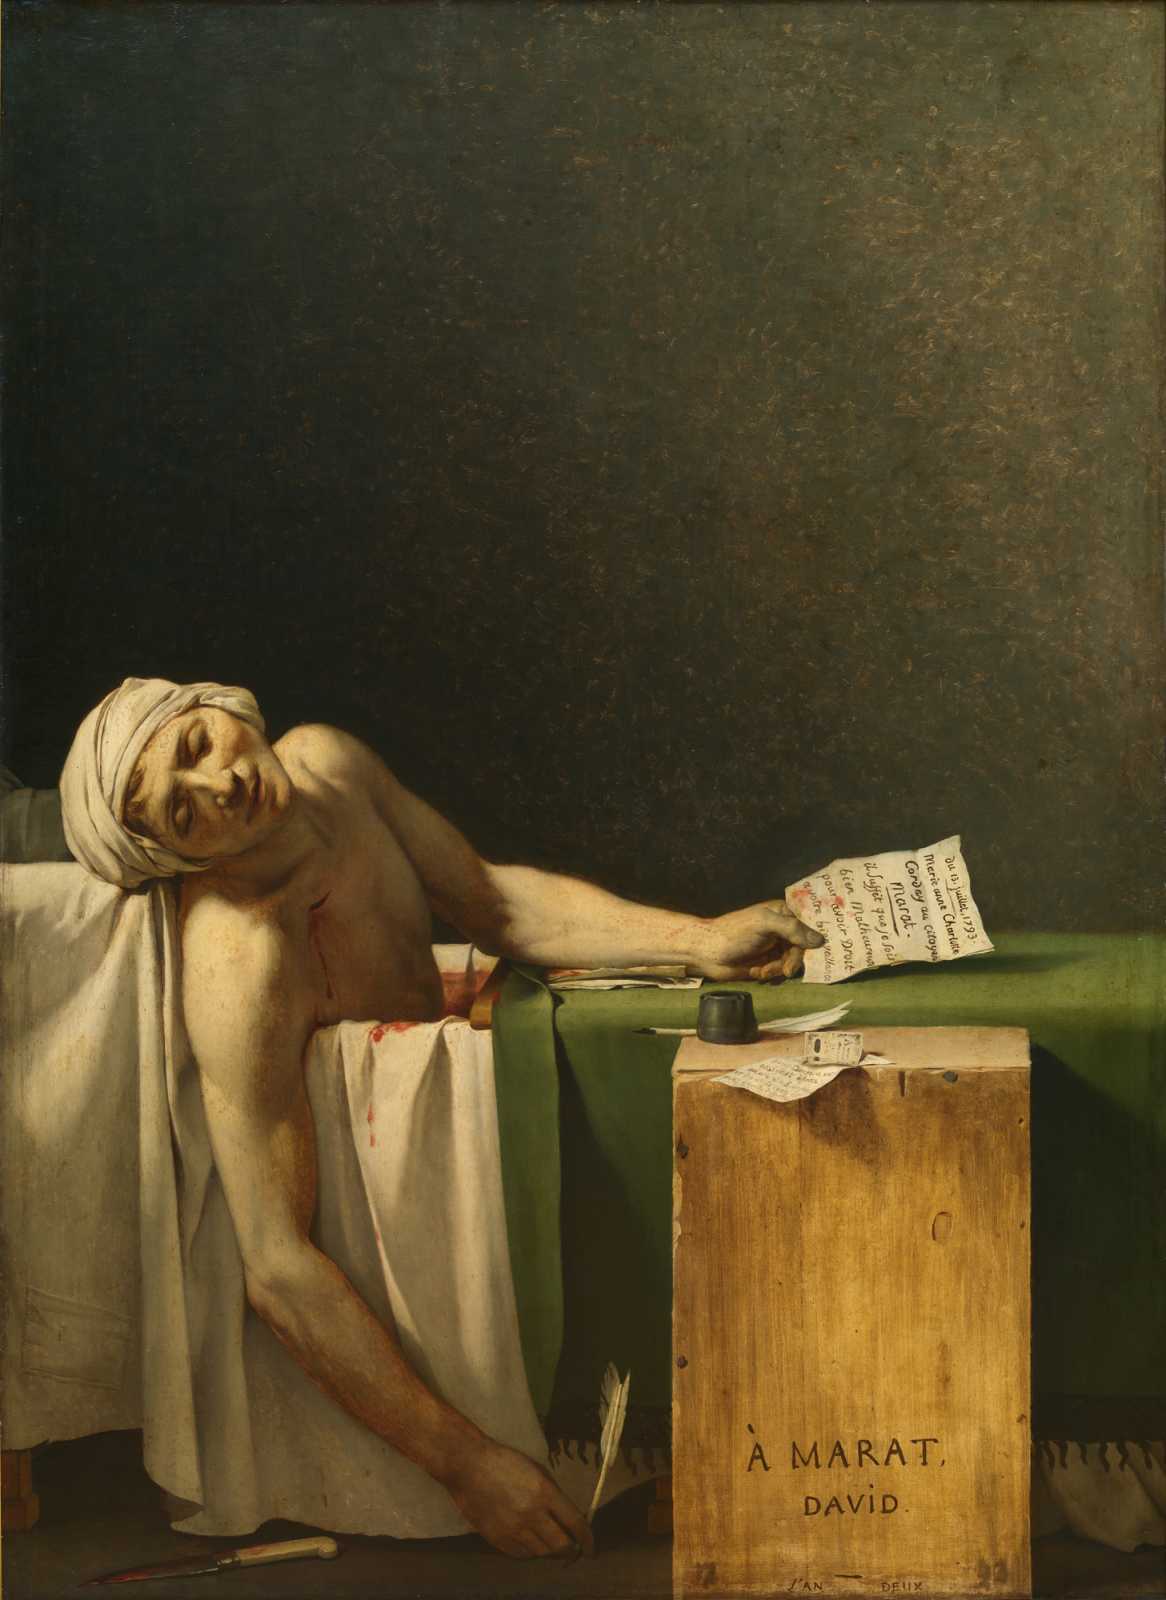
I just decided to try master study in 3d application, as always my first choice are Zbrush, (and I want whole the processes to get it done in zbrush).The master piece I try to do is "The Death of Marat" by Jacques-Louis David. actually it's one of my best favorite historical painting. (Y).
--------------------------------------------------
MODELLING--------------------------------------------------
1.Start it with 8 head mannequin, remove all the lower part, adaptive mesh it ,and match it with the reference. what the first mistake I did. I matched it in isometric camera, but you must did it in perspective mode. I recommend it 25 aov.

--------------------------------------------------
2.Now start sculpting and don't push yourself to make exact likeness(20 or 30 minutes sculpting will be enough) , just make sure you have a nice and correct volume body,(Adhere to the principles of anatomy). you must be careful when you sculpting asymmetrically.!

--------------------------------------------------
3.Now it's time to working on the head, so pull out the head, unify it and use the zremesher symmetrically, use the dynamesh sphere for kerchief, after all of that insert the head. replace it, and merge it with the main body, and dynamesh it.
--------------------------------------------------
4.Do the same thing for hand, after that mirror it and repose the left one. don't forget to use the polygroup for each finger.

--------------------------------------------------
5.Make a simple plane and edit it with Zmodeler and sculpt it.
I download the nice lace trim texture at www.cgtextures.com, after that edit and optimize it with photoshop, now loaded it as a alpha, and use "Make 3D" to make it in 3d object,
finally array that in x axis and dynamesh it.
--------------------------------------------------
6.For hanging fabric or cloth, I use a simple box for model that.
usually for cloth sculpting I use the standard , dam_standard , flatten and inflat brushes.
(layer brush lilibit in use..!)
usually for cloth sculpting I use the standard , dam_standard , flatten and inflat brushes.
(layer brush lilibit in use..!)

--------------------------------------------------
7.As you can see I use the zmodeler and shadow box for create another assets.
for ashtray, after zmodeler processes done, you can use dynamic subdiv, then turn the object into dynamesh,use the "insert sphere" brush in (Z) and (X) axis es symmetrical . and don't forget to hold the alt key.
for quill use the simple cylinder, and deform it deformation tools, use trim for tip, dynamesh it, use the move and flatten brush for some curvy shape and beveling edge, and finally zremesh it.
forget about the feather and knife, it's easy..! ;) (zmodeler for knife and shadowbox for feather)

--------------------------------------------------
8.At last, append all the objects in to the main body part,and repose all the assets withtranspose tools, and don't forget to see reference constantly.
--------------------------------------------------
MATERIALS AND RENDERING
--------------------------------------------------Textures:
9.before I go to the next step, I just some touching my model and little bit enhance it with move brush, (just in case to know if you see lilibit changing).
I start with solid color to filling my objects, (that's the first part I've always to use for texturing).
after that using polypaint for texture, I really did't spent much time for texturing, just some skin pain for body having fun with wood, papers and of course some BLOOD..! :s

--------------------------------------------------
Shaders:
10.that's part where I really would love for a long time to do, first, turn off all the zbrush main lights system,the reason it's because I want to simulate the 2dpainting's lights & shadows. (I know Louis David very well done in this part (it's not any wrong)) but I can still see some different direction shadows, I want to create light cap for each shaders separately, this allows me to have a separate control for specular and shadows in each objects.
I created some customize matcap for my models, all objects holds "doubleshade1". the first mat cap which common for all, I created with matcap 2.5D brush as I use it in my reference image(can see it on first top post).
another matcaps used for slot2, and combine all of them with shader mixer together, to get sightly result.

--------------------------------------------------
Composite:
11.so now use the bpr for rendering, and don't for get to use bpr filters, they'are truly amazing, at last use the passes and composite them into photoshop. (the ObjID pass is't into bpr passes, you must do it manually).

final Render:

ok then..Hopefully helpful.
welcome to C&C.
baby now!
Comments
Post a Comment